- Introduction
- Download from Faboba
- Installing Falang
- Install/Re-install Language Packs
- System Language Filter
- Translating Content
- Add the Falang Download ID
- Setup Previews language translation service
- Translate Menu Items
- Translate Article Categories
- Using the FaLang Language Switcher in the front end
- Set Multilingual Modules
Introduction
A different approach to creating a multilingual site is to add the Falang Component to a regular non-multilingual Joomla site. This article describes installing the Falang Component, which is available from Joomla extensions-Farlang (opens in a new window/tab). As an example French and German languages are installed and configured.
Typically a web site has are some 'regular' articles and article categories in English together with a Menu and Menu Items. The French and German versions are then created with Falang. Here we are using the 'Pro' version of Falang which may be used on many sites. This is a paid version. There are also versions that are restricted to a single site at a lower cost and there is also a free version with limited capability.
Falang is compatible with Joomla 4, 5 and 6. The following notes relate to installing faLang 6.8 which was released in July 2026.
There is a 'continuation' article on adding Falang support for jDownloads (opens in a new window/tab) but obviously Falang needs to be installed in Joomla first.
Download from Faboba
You will first need to get an account at www.faboba.com .
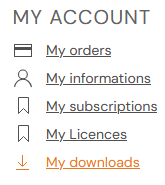
Assuming you have an account, then click on the
 Enter the email and password details and click on
 Next click on
This gives a list of Falang Official Releases as shown on the right.
Click on
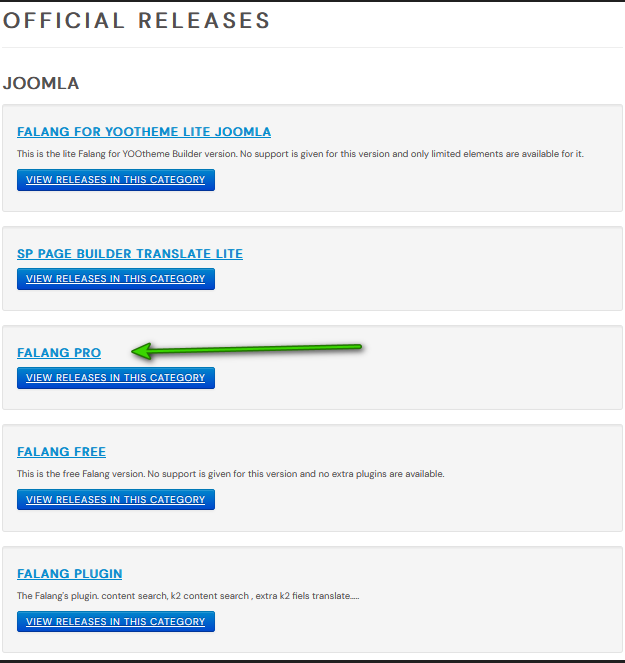
This lists the available versions of Falang Pro with the most recent version at the top of the list.
At the time of updating this is version 6.8. Click on the
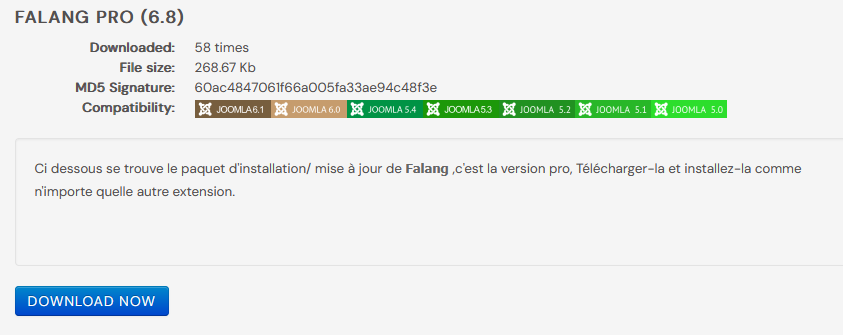
This starts the download to your device. When done, click on the button marked as 1 in the image opposite.
Next click on the button marked as 2.
This shows the downloaded file 'pkg_falang-6.8_pro.zip'. So click on it and save it a in a suitable location on your device.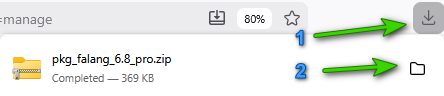
Next click on the button marked as 2.
This shows the downloaded file 'pkg_falang-6.8_pro.zip'. So click on it and save it a in a suitable location on your device.
Installing Falang
This follows the usual procedure for installing a component. Here it is assumed that Falang has been downloaded and is located in a suitable directory on your PC or laptop.
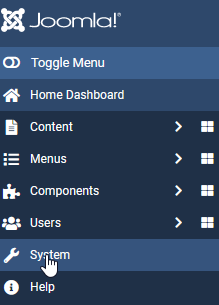
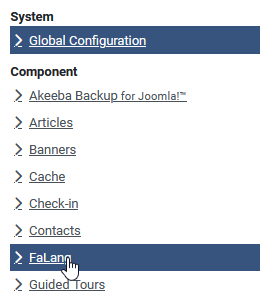
In the Joomla Menu, click on the
This gives the system dashboard page.
Near the top left, find the section
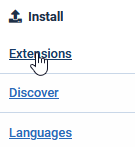
This shows the various ways of installing an extension.
If using the method then either browse for or drop the Falang Component zip file onto the web page.
This goes through two stages:
(1) Uploading and (2) Installation. A progress bar is shown as the installion proceeds.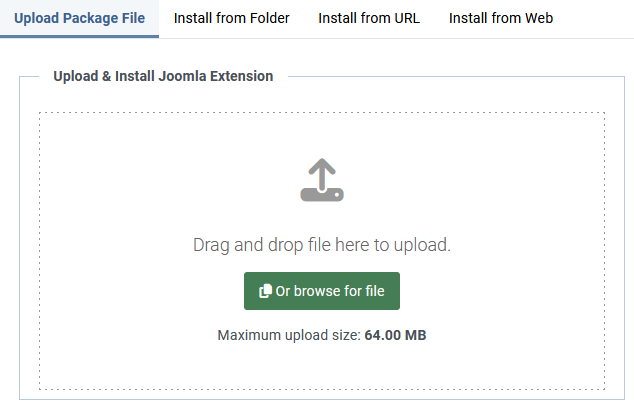
If using the
This goes through two stages:
(1) Uploading and (2) Installation. A progress bar is shown as the installion proceeds.
Verify Installation
To verify goto the  and click on
  . Then in the
  section click on
  . Next set the search to falang and click on the search button
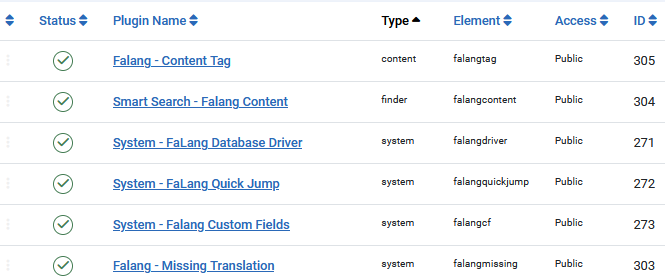
  . In total nine items are installed are shown below. There is the Falang Component, the Falang Package, the Farlang L.anguage Switcher Module and six plugins.
Ensure that the Status of each of the nine items is enabled, that is each item has a symbol in the Status Column.
The ID values are specific to each installation and will not in general be the same as those shown below.
Ensure that the Status of each of the nine items is enabled, that is each item has a
The ID values are specific to each installation and will not in general be the same as those shown below.

To just find the plugins, click on then in the  section click on
  . Next type falang into the search bar, as indicated, and click in the Search Button
  .
.
Check Plugins
Next click on
The installation is now completed.
Falang Status Indicators
One of the most useful aspects of Falang are what is referred to here as 'Status Indicators'. They are particularly useful when adding content items.
As indicated in the image opposite there are FaLang translation status indicators  , showing the 'status' of an item, such as a menu item, an article and so on.
Interpreting Falang Status indicator
It is useful to understand the Falang status indicators in the 'Farlang' column of content such as menu items, articles and so on. There is a status indicator for each addional languages.
The status indicators have:
(i) a language code, EN, denoting the base language, and others such as DE or FR for the extra languages installed in this example;
(i) a coloured line on the top which has three states: red, orange or green;
(ii) the other is a coloured 'dot' at bottom right which has two states: red or green.
Each language status indicator is independent of other lalanguage indicators.
The various combinations of a status indicator are:


 .
.
The status indicators have:
(i) a language code, EN, denoting the base language, and others such as DE or FR for the extra languages installed in this example;
(i) a coloured line on the top which has three states: red, orange or green;
(ii) the other is a coloured 'dot' at bottom right which has two states: red or green.
Each language status indicator is independent of other lalanguage indicators.
The various combinations of a status indicator are:
Status indicator means that all FaLang requirements for that item have been met.
Status indicatorprobably means that the translation steps have not been started yet for that particular item.
The orange top on the Status Indicatormeans that 'Use Original Parameters' is involved. It shows as  . In some cases it is
  which means we are not using the original parameters in the translated item.
The Red Button at bottom right means the item is not Published. The Orange bar at the top means the translation is not complete. The green top means the item has been translated satisfactorily and the Red dot indicates that the item now needs to be published.
The green top means the item has been translated satisfactorily and the Red dot indicates that the item now needs to be published.Install/Re-install Language Packs
It is convenient at this stage to install/update the relevant Joomla Language Packs. In this example we will install French and German.
First we will install the French Language Pack. So in the go to - then in the section click on  . Next in the top bar click on
  . Scroll down the list of languages to find French. If the French Language has an
  button, it means either that the language has not been installed previously or it is a completely new version .So click on . But if it has
  it often means that the language file has been updated so click on
  . Basically just click on the button !
This should reply with a message such as .
.
Repeat the process for the German Language Pack.
At the time of writing both the French language pack and the German Language pack are at version 6.1.1.1 . The English Language pack is set as the default language as denoted by a symbol.
Note if you had already installed languages with an earlier version of FaLang you might need to ReInstall them to get the latest translations.
First we will install the French Language Pack. So in the
This should reply with a message such as
Repeat the process for the German Language Pack.
At the time of writing both the French language pack and the German Language pack are at version 6.1.1.1 . The English Language pack is set as the default language as denoted by a
Note if you had already installed languages with an earlier version of FaLang you might need to ReInstall them to get the latest translations.
Publish Languages
We now have to publish the languages. So go to , then in thesection, this time click on  .
.
.The recently installed languages may have a  symbol. So click on each of those with asymbol. This will change to a
  indicating the language is published as shown opposite.
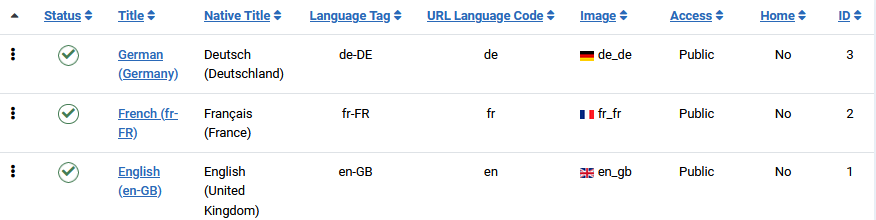
When doing an update also check if any of the languages you are using have an update available. So go to then in the  section click on . Next click on
  . This will list the languages you have installed, which in this example are French and German. If there is an update it will be shown in Yellow in the Version column as illustrated below. Specifically the image below indicates version 5.3.3 of French and version 5.3.3.1 of German are available.
Note that the default language, English in this example, is shown with a in the Default column.
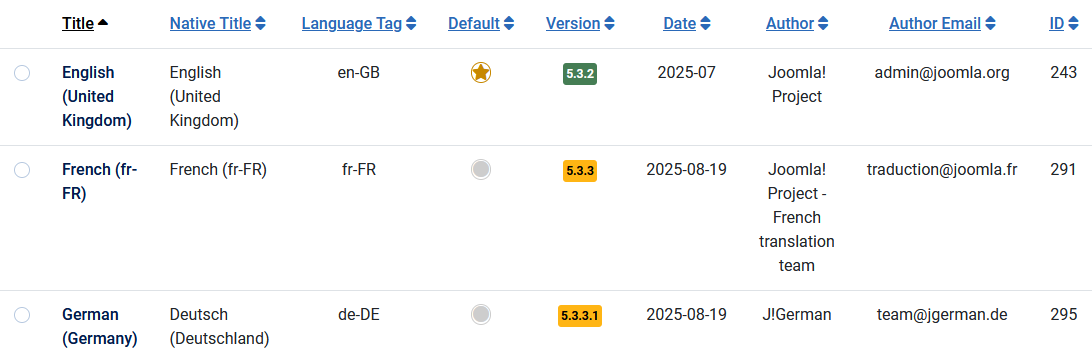 The available language updates are shown in the yellow version numbers in the version column. That is in this example to update the French language click on the
  . This will initiate the actual language update. Repeat for the German language.
After updating the relevant languages to the latest versions they will be shown with a green background as shown below.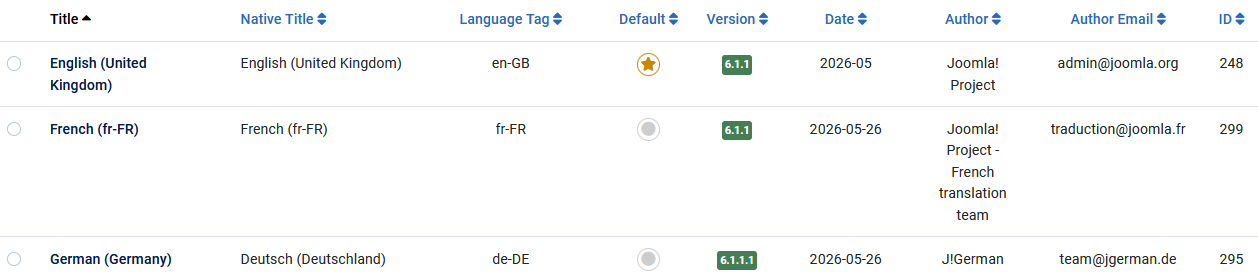
section click on Note that the default language, English in this example, is shown with a
The available language updates are shown in the yellow version numbers in the version column. That is in this example to update the French language click on the After updating the relevant languages to the latest versions they will be shown with a green background as shown below.
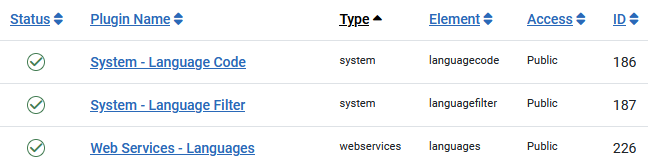
System Language Filter
We also need the System-Language Filter, the System-Language Code and the Web Service-Languages plugins . To find these click on . Then in section click on . Then in the Search Bar set 'language'.
Then click on the Search bar .
.
Then click on the Search bar
The three system language plugins are illustrated opposite. If they are not enabled, that is there are one or more  symbols in the Status column, then click on the so it shows a . This indicates the item is enabled (published).
Configure FaLang Language Switcher
Go to then in the section select  . Then search for the Falang Language Switcher. This will show the
  module which we need to configure. So click on. Notice at the top right it has the flags of the installed languages:
  .
.
Click on the module title to open it.
First select the Position, which in Joomla is typically sidebar-right. NB this is not numbered in the imasge on the right.
1. On the lefthand side ensure both Use Dropdown and Use advanced dropdown are both set to No.
2. Set the Options Horizontal Display, Active Language, Use Image Flags and Language Full Names to Yes.
3. Set Show Name to No.
4. Set status to Published.
5. Set access to Public.
6. Now select the tab and ensure it is set to show On all pages.
Personally I leave both Pre-text and Post-text empty. Both are at the bottom of the module setup.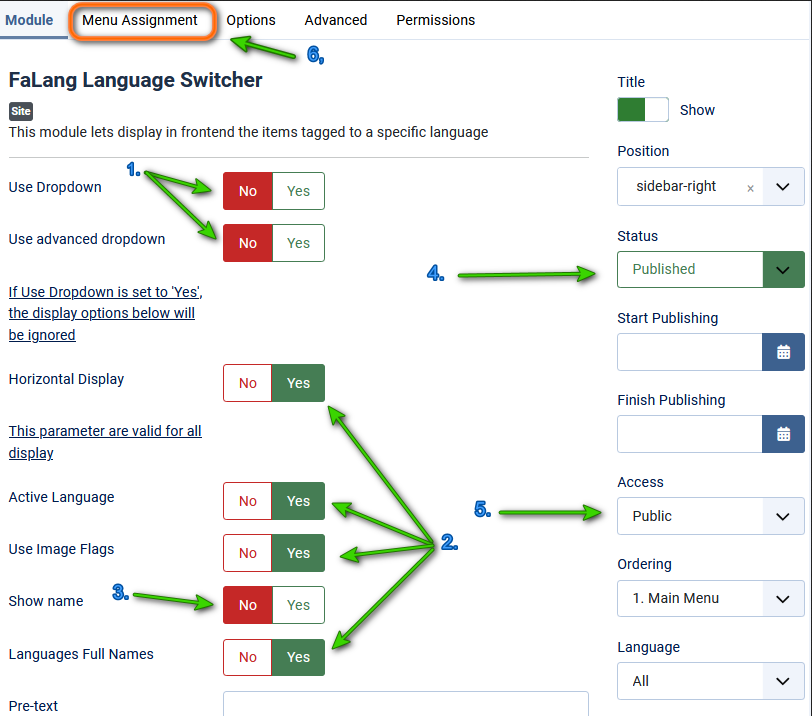
First select the Position, which in Joomla is typically sidebar-right. NB this is not numbered in the imasge on the right.
1. On the lefthand side ensure both Use Dropdown and Use advanced dropdown are both set to No.
2. Set the Options Horizontal Display, Active Language, Use Image Flags and Language Full Names to Yes.
3. Set Show Name to No.
4. Set status to Published.
5. Set access to Public.
6. Now select the
Personally I leave both Pre-text and Post-text empty. Both are at the bottom of the module setup.
Finally on the bar at the very top click on  .
.
However if we look at the Falang status it shows . This is because the module has not been Published by Falang or set to use the Original Parameters.
To access these items click on the Falang Language Switcher. At the top Right there are flags denoting each language . All three language flags have red X denoting one or more translation actions are required. Note if you are just updating to the next version then the situation is most likey to be different!
However if we look at the Falang status it shows
To access these items click on the Falang Language Switcher. At the top Right there are flags denoting each language
Clicking on the EN flag shows that the module has not been published and that 'original' parameters have not been used.
After clicking on 'Published' and 'Use original parameters' each beomes green as illustrated below.


After setting the above, the Flags become good:

After clicking on 'Published' and 'Use original parameters' each beomes green as illustrated below.
After setting the above, the Flags become good:
Translating Content
Content basically means those items that appear on the normal user page. This includes Articles, Menu items, Modules and so on. For jDownloads this includes the views generated by Layouts.
If in the FaLang column the status of a content item shows any orange bar, red bar or red dot, then this means that some translation actions are required. For example in a new intallation the Falang Language Switcher module status maybe . If so this indicates that unsurprisingly that the French and German version require attention.
If you Click on then in the section click on  , then search for falang. This may show that the Falang Language Switcher module is not published. So publish it by clicking on the . It should now become .
If in the FaLang column the status of a content item shows any orange bar, red bar or red dot, then this means that some translation actions are required. For example in a new intallation the Falang Language Switcher module status maybe
If you Click on
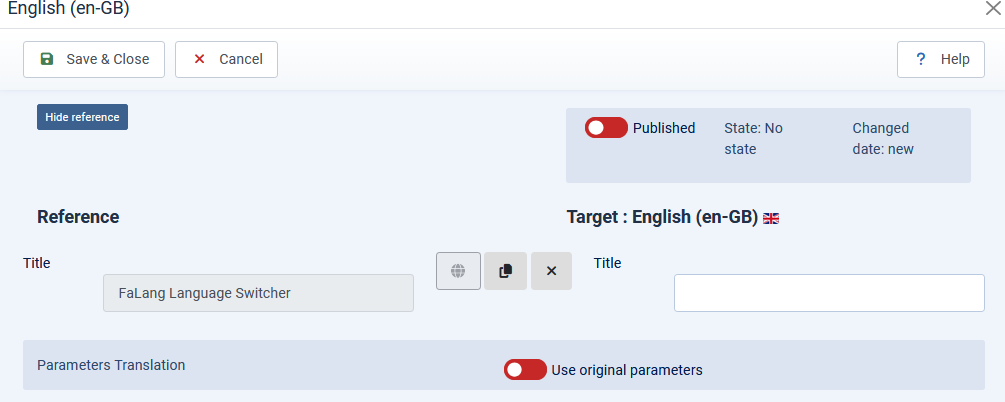
Next click on the French Flag,  , which givs a view like the image shown opposite. Note in the Reference section there is a Title with the Enlish text "FaLang Language Switcher" but the corresponding Target is empty.
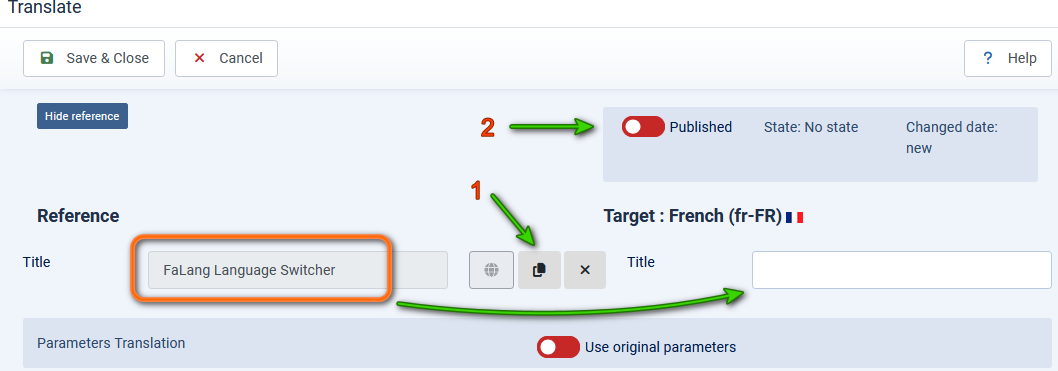
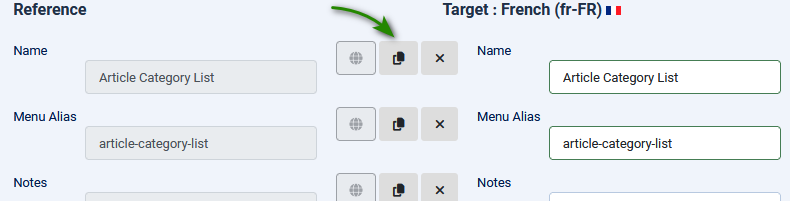
The first step is to copy the English on the left side to the right side by clicking on  button. Next take a copy of the text and use your translation service to translate to French and overwrite the English on the righthand side. After ensuring the item is
  then Save and Close.
Repeat for the German language by clicking on .
.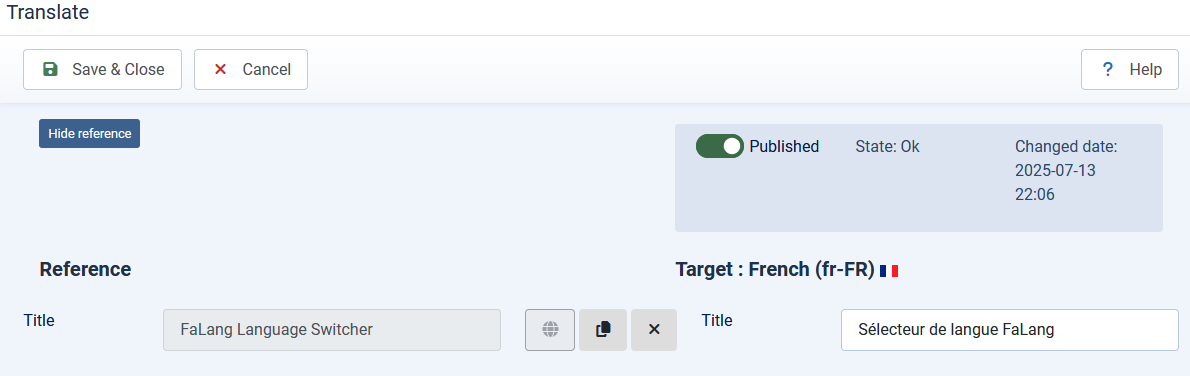
Repeat for the German language by clicking on
The result is that the language shown by the 'Switcher' in the front end matches the flag that was clicked on. Essentially a Translation process has been completed.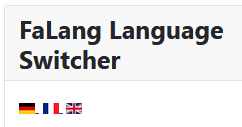
Add the Falang Download ID
If this is a first time install of Falang then you will need to find your unique Download ID to get updates. You need to login to your to your faboba account (opens in a new window/tab) Then at top select  This shows a pulldown menu. Next click on
  .This will show your Download ID. So make a copy somewhere safe. Then enter your Download ID into
  -
-  -
-  - then at top right
 -
-  tab. Copy the ID into the Download ID field as shown opposite.
Note when copying the ID it is eay to accidentally include the colon ':' character, which is not part of the ID.
Note when copying the ID it is eay to accidentally include the colon ':' character, which is not part of the ID.
Setup Previews language translation service
Show Previews
This Translation Service is required to provide Previews in Falang. The actual translations are done externally by say DeepL or Google Translate ( Each Link opens in a new window/tab). Google is free to use and DeepL has a free option.
Select then in the  section at top left, click on
  . Below this, on the left hand side, is long list of Components in alphabetical order as illustrated opposite. Scroll down until you find
  .
.
Select
This opens up a set of choices
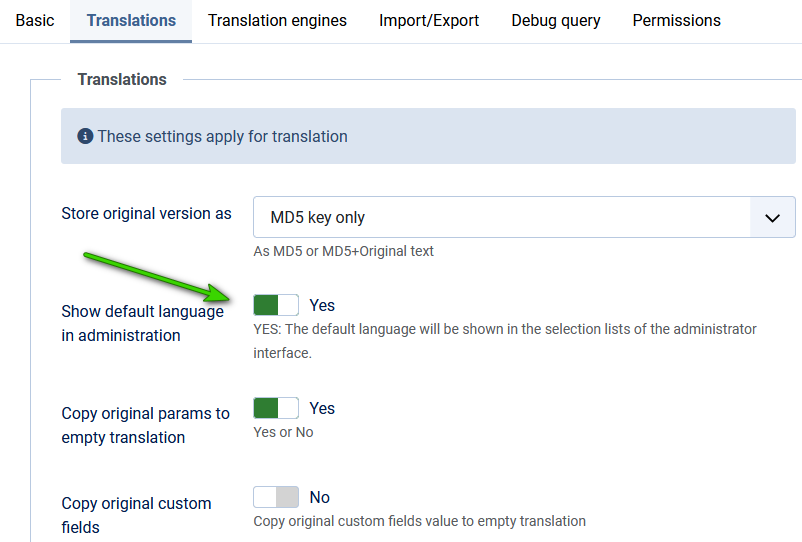
Set parameter 'Show default language in administration' to Yes as indicated opposite.
Select Translation Engine
Once again Select then in the section at top left, click on . Below this, on the left hand side, is long list of Components in alphabetical order as illustrated earlier. Scroll down until you find .
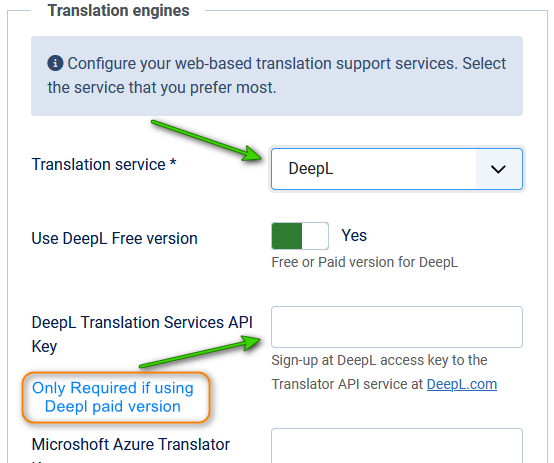
This will allow selection of the actual translation service. In this example we will select Deepl as it has a free translation service as well as a paid one. So click on Translation Engines as indicated.
Use the Translation Service * pulldown to select Deepl.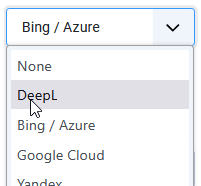 Then ensure you set Yes in 'Use Deepl Free Version'
 The actual translations are done externally. I have used either Google Translate or Deepl Free when creating language content in my demonstration site.
Then ensure you set Yes in 'Use Deepl Free Version'The actual translations are done externally. I have used either Google Translate or Deepl Free when creating language content in my demonstration site.So do a Save & Close
You will see a message
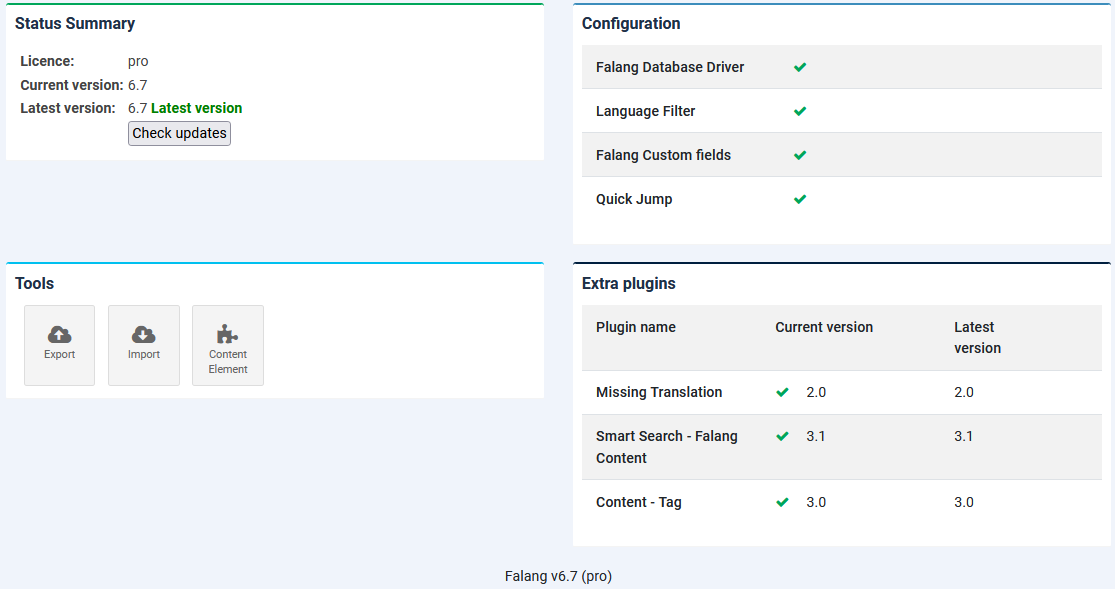
 Below it will be a Status Summary, Configuration, Tools and Extra plugins panels as shown opposite.
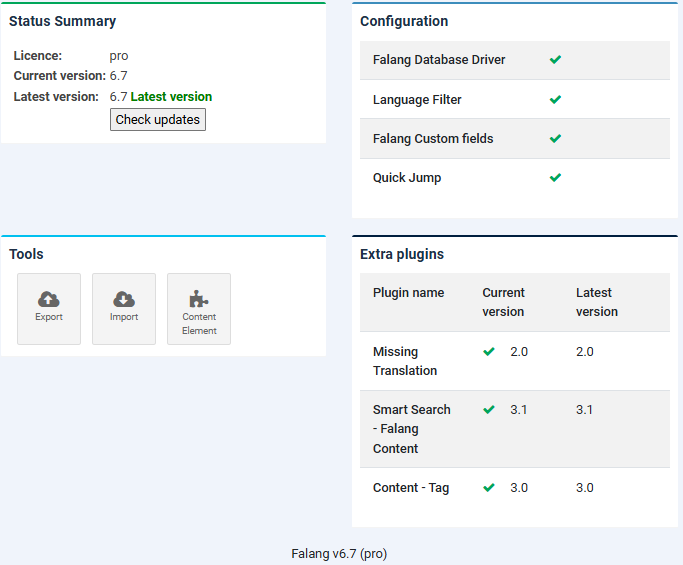
Next Drag or Drop one of the plugin zip files onto the Joomla Upload & Install page. Repeat for each of the optional plugins.
The view opposite shows the standard and the optional plugins.
After Installing the extra plugins, ensure they are enabled as shown in the image on the right.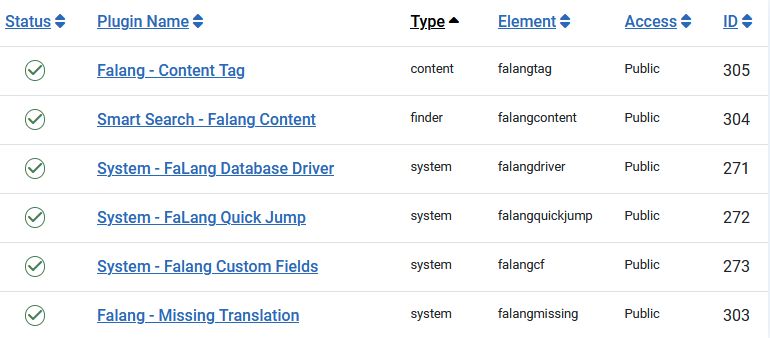
The view opposite shows the standard and the optional plugins.
After Installing the extra plugins, ensure they are enabled as shown in the image on the right.
Translate Menu Items
The first action is to add menu items to the Main Menu. This will then allow checking in the front end on the progress as items are added.
A suitable Menu Item is List All Downloads, so click on the menu item name to get a view as shown opposite.
Ensure the item language is All.
Note the FaLang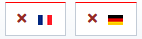 buttons at top right. These are added after the menu is Saved. They enable us to create the corresponding French and German Menu items as described below.
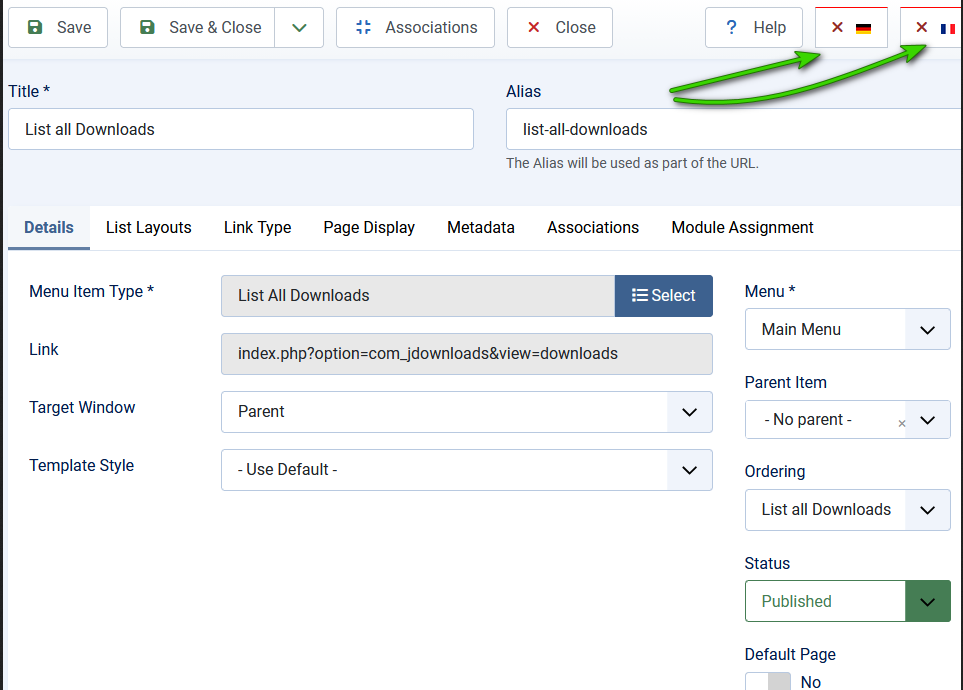
Ensure the item language is All.
Note the FaLang
Next cick on  . Use the to copy from the reference side to the Target side. Then, for example, copy 'Article Category List' from the Target side and use your Translation service to translate to French. Typically the translation is "Liste des catégories d'articles" so use that to overwrite the Target Side name field.
When all the tanslations have been completed then click on the so is it shows
  .
.
Do not change the button.
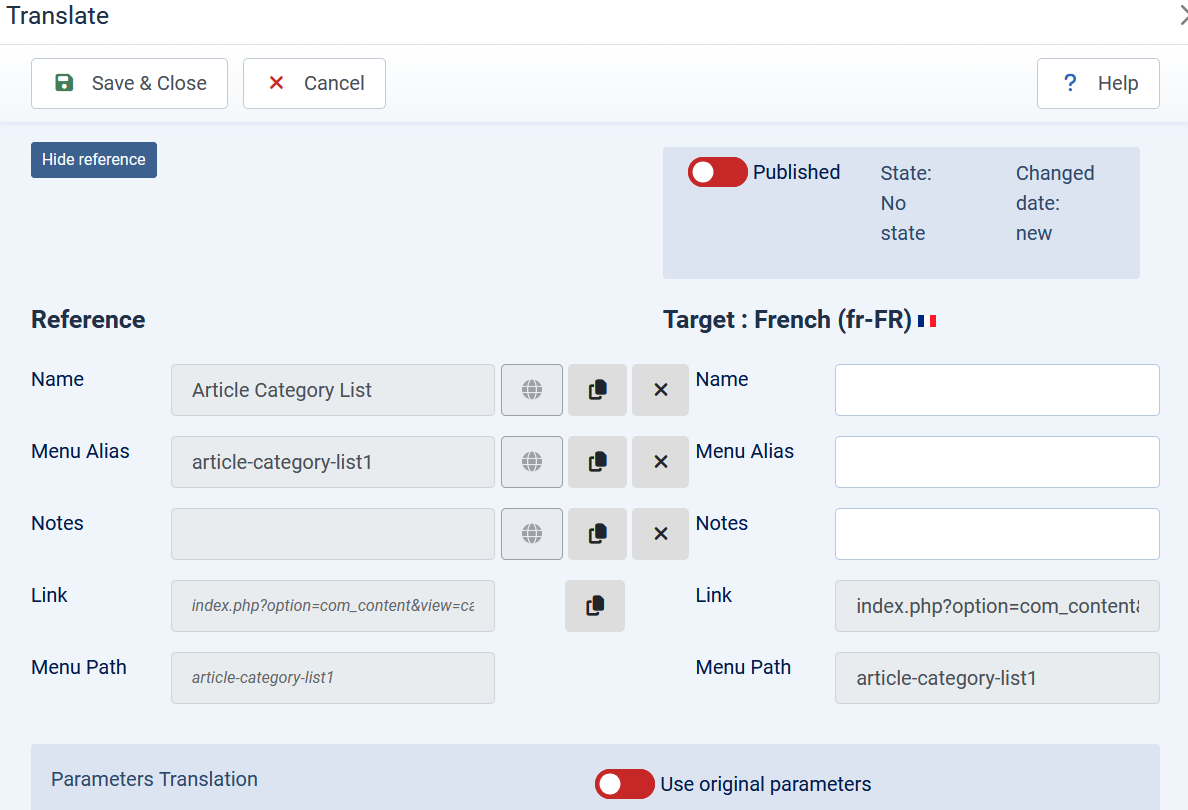
When all the tanslations have been completed then click on the
Do not change the
The resultant view is as shown opposite and the Falang menu item status is now  Next setup the German menu item.
All the other Menu items need the same treatment as described above.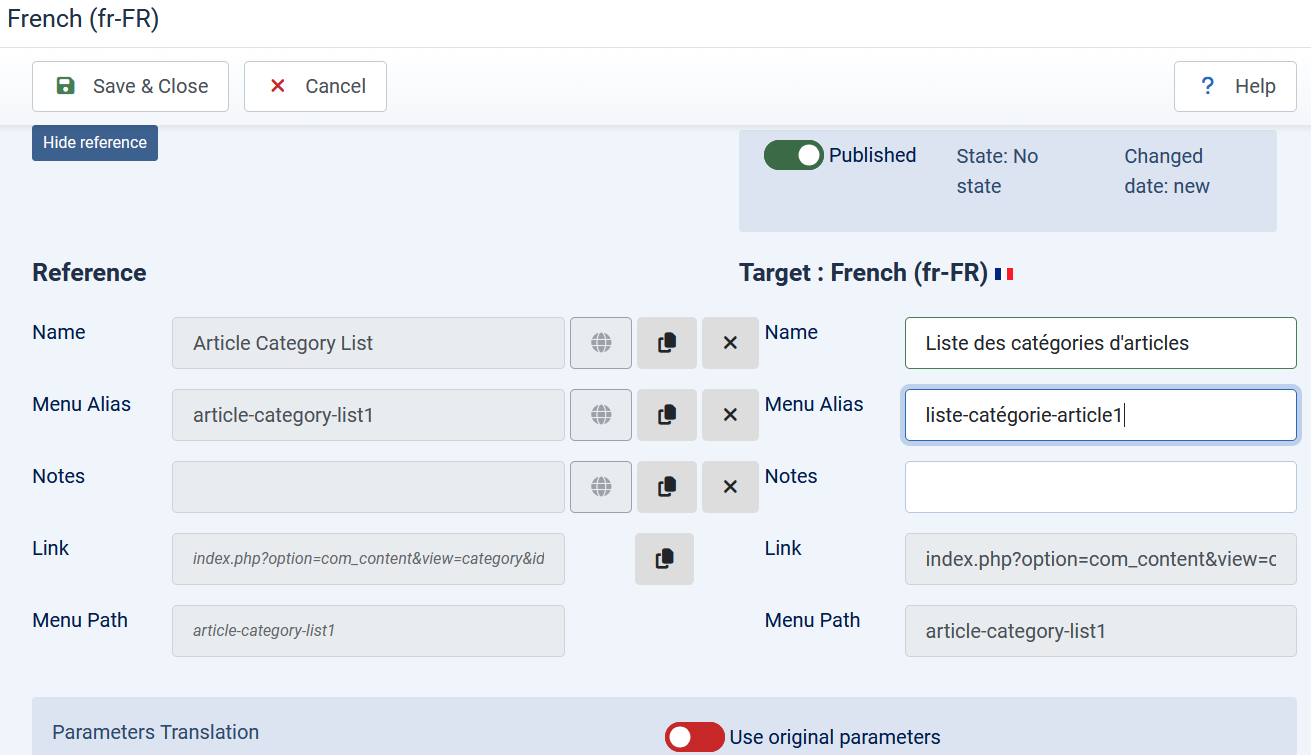
Next setup the German menu item.All the other Menu items need the same treatment as described above.
This shows the Article Category List menu item for English. Note the FaLang status buttons on the far right. Th red dot in the FR partindicates that the French version needs attention.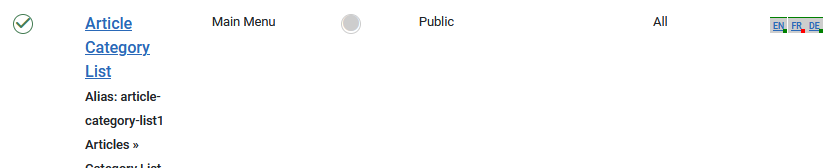
These are the FaLang 'buttons' to initiate making the equivalent French and German corresponding menu items. As noted earlier, the red 'bar' at the top and the red 'dot' at bottom right indicate that no translation of this menu item has been made.
It is essential that you use the Button each time after you have added all the translations for each menu item
It is essential that you use the
NOTE FaLang does not do any translations itself. It provides the infrastructure and organisation. I used either Deepl or Google Translate as both have free versions.
Create corresponding menu items for Other Languages
The English menu item now has  buttons as shown on the righthand side.
To generate the equivalent French menu click on the button.
To generate the equivalent French menu click on the
This brings up the basic "translation page" with the Reference English on the Left side and space for the translated equivalent on the Right side.

Now use the  button which will copy the English on the left to the French side on the right. At this stage it will of course still be in English.
We are now able to take a copy those parts on the righthand side so as to translate them.
We are now able to take a copy those parts on the righthand side so as to translate them.
Using a translation faciilty such as Deepl or Google in a separate window or tab, paste the English language text on the left side and set French as the target language.
When the translation is done, copy the result into the appropriate part of the target.
Repeat until all parts have been translated.

When all parts have been translated and copied back into the form then click on the  at the top of the form.
Now repeat the entire process for the German language by clicking on the  in the Article Category List menu item
Translate Article Categories
In my test website there is an article category with the name 'General Articles Category'.
There is also a column called FaLang with English, French and German options, showing the status of the translation process.
So to generate say the French translation click on the FR option.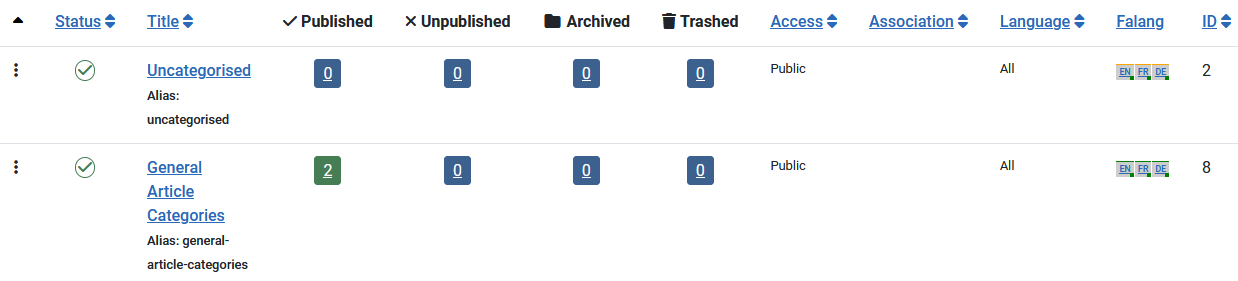
There is also a column called FaLang with English, French and German options,
So to generate say the French translation click on the FR option.
This gives a view of the English Language on the Left. Initially the righthand side items Title, Alias and so on are blank. As previously use the  button to copy the English from the left to the right. Copy an item on the 'French' side, then use an external translation service to translate this to French. Copy the translation over the original English part as shown in the image opposite.
Also note the need to ensure it is Published. If for example you had forgotten to publish the French article the status would be Unpublished.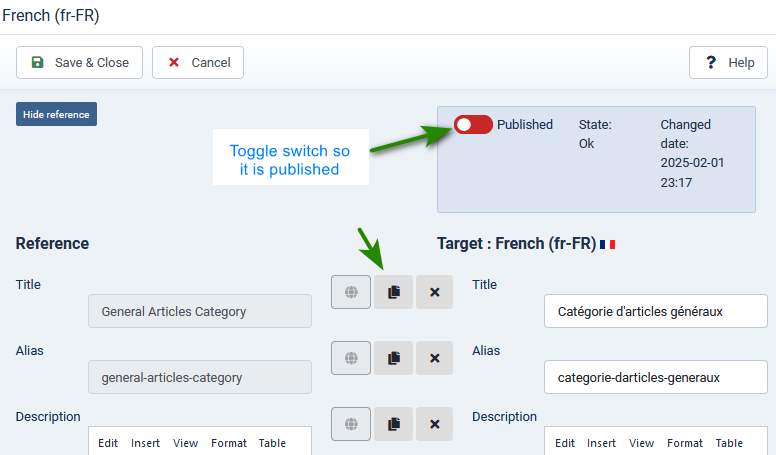
Also note the need to ensure it is Published. If for example you had forgotten to publish the French article the status would be Unpublished.
Using the FaLang Language Switcher in the front end
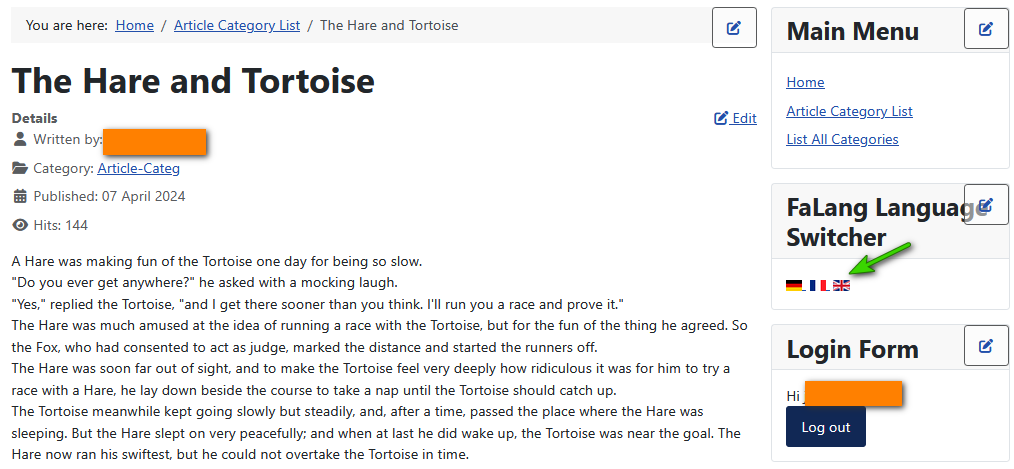
The article shown opposite is the Hare and Tortoise in English
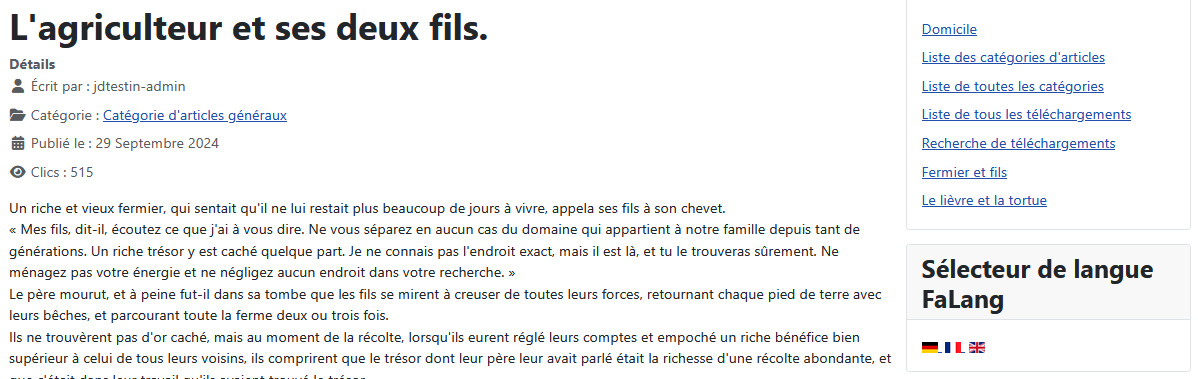
The article shown opposite is the Hare and Tortoise in French
The article shown opposite is the Hare and Tortoise in German

Set Multilingual Modules
As well as aticles and similar, Falang supports multilingual Modules. As an example we will use the login modue as that is always required..
So in the main Joomla administration Menu, click on and then in the section click on . This opens up the list of modules. Scroll down to  . and click on it. Note it is presumed all the usual login settings have been made.
So in the main Joomla administration Menu, click on
In this Example the English and French login forms have been translated, so click on the German part of the language selector. 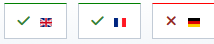 The only thing normally required is the translation of the Title as shown opposite. When done click on the
  button.
Next repeat for the German language.
If you examine the list of modules, then the Falang column shows for the login module.
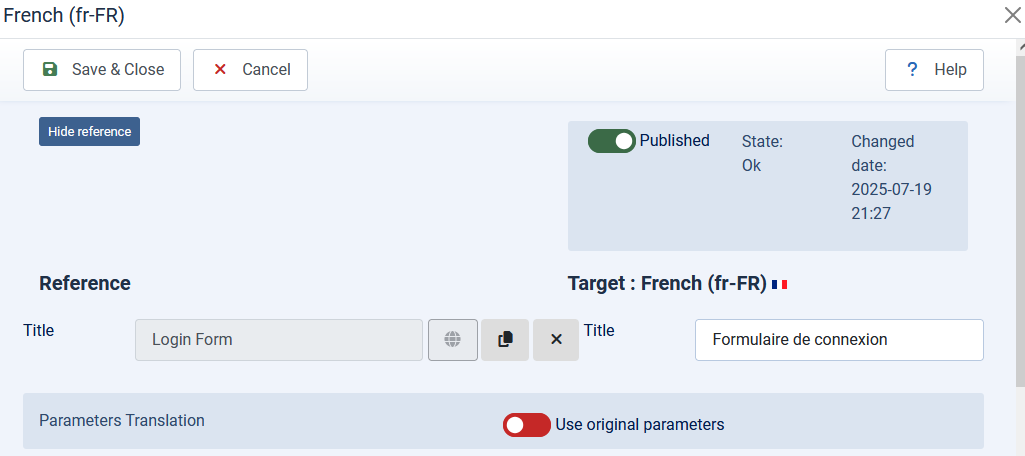
Next repeat for the German language.
If you examine the list of modules, then the Falang column shows
Falang is now Installed/Updated and Configured for a regular multilingual site.
There is a 'continuation' article on adding Falang support for jDownloads (opens in a new window/tab)
There is a 'continuation' article on adding Falang support for jDownloads (opens in a new window/tab)
ColinM February 2025, Updated May 2025, July 2025, Sept 2025, January 2026, March 2026, May 2026, July 2026